 how-to
Darning: A Beginner's Guide to Repairing Clothes
Table of Contents
- Why Darning Is the Skill Your Wardrobe Needs in 2026
- How to Darn a Hole in 5 Simple Steps
- Darning Tools: What You Really Need (and What You Don't)
- The Darning Stitch: Master the Basic Weave
- Darning Loom: Speed Up Your Repairs on Knits and Denim
- Visible vs. Invisible Darning: Which Style Suits Your Garment?
- Common Mistakes That Ruin a Darn (and How to Avoid Them)
- Conclusion: Start Darning Today, Keep Your Clothes Longer
- Frequently Asked Questions
Last Updated: October 8, 2026
Why Darning Is the Skill Your Wardrobe Needs in 2026
Darning is the craft of weaving new thread into worn or torn fabric to rebuild it, rather than just closing the hole. It is one of the oldest repair skills in the world, and it is quietly making a comeback. At Funalya, we built our whole business around one simple belief: a small hole should never cost you a favorite sweater.
Textile waste is a real problem. The Ellen MacArthur Foundation's work on textile waste has shown for years that clothing production and disposal put heavy pressure on landfills and resources. Most people throw away garments over damage that takes twenty minutes to fix.
Darning saves money, too. A repaired sweater is a sweater you don't replace.
Here is what most guides get wrong: they treat darning as a sewing skill. It isn't. It's a weaving skill, and weaving is far more forgiving than most people expect.
Below, we break down exactly how to darn a hole, which tools matter, and which mistakes wreck a repair.
How to Darn a Hole in 5 Simple Steps
The core method never changes: build a grid of threads across the hole, then weave through them. Everything else is detail. Follow these five steps and you will have a solid, wearable patch.
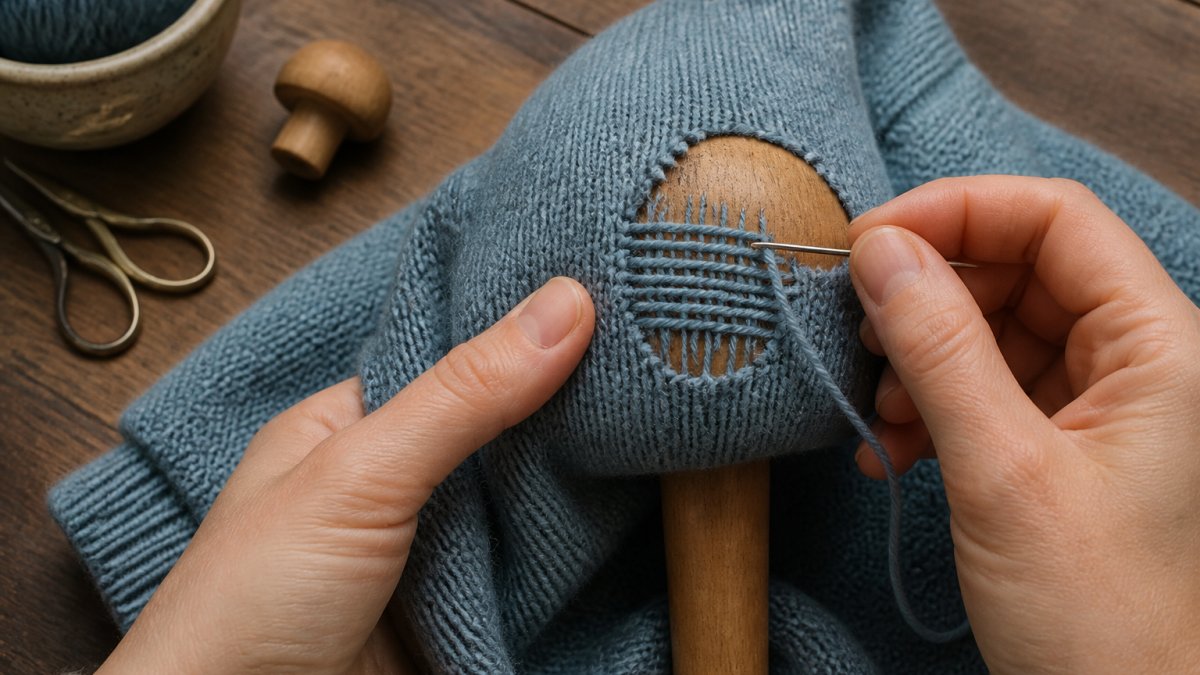
Step 1: Prepare the Hole and Secure the Edges
Trim any loose, frayed threads around the hole with small scissors. Don't cut into stable fabric. If the edges are ragged, run a quick line of small stitches around the rim to stop further fraying. This step takes two minutes and prevents the hole from growing.
Step 2: Build the Warp Threads
Thread your needle and anchor it on the wrong side of the fabric. Work parallel stitches straight across the hole, like rungs on a ladder. Keep them evenly spaced, about 3-5 mm apart. These vertical threads are the warp, and they form the foundation of your patch.
Step 3: Weave the Weft Threads
Now weave the needle over and under the warp threads, row by row. Go over one, under the next, then reverse the pattern on the following row. This creates a woven grid. Don't pull tight. The patch should sit flat, not pucker.
Step 4: Finish and Check the Tension
Weave a little past the hole on every side so the patch grips solid fabric. Knot off on the wrong side. Run your finger over the repair. It should feel smooth and slightly flexible. If it's stiff or puckered, your tension was too tight.
Step 5: Press and Wear
Press the patch gently with an iron on low heat. This settles the threads and blends the repair into the garment. Then wear it. The patch gets softer and less obvious with every wash.
Darning Tools: What You Really Need (and What You Don't)
You can start darning with almost nothing. A needle, thread, and something round to hold the fabric taut will get you through your first repair. Everything beyond that is comfort, speed, or polish.
The Essentials
- Darning needles: longer than standard needles, with a large eye for thicker yarn
- Yarn or thread: match the weight of the fabric, not just the color
- Small scissors: for trimming frayed edges cleanly
- A darning mushroom or egg: holds the fabric taut while you work
Nice-to-Have Tools
- A darning loom: speeds up larger repairs on knits and denim
- A needle threader: helpful if your eyesight or patience is limited
- A seam ripper: for cleaning up messy edges before you start
- A small storage tin: keeps everything together so you actually use it
What most guides miss is that thread weight matters more than color. A heavy yarn on a thin knit creates a lumpy, obvious patch. Match the weight first, then get close on color.
The Darning Stitch: Master the Basic Weave
The darning stitch is a simple over-and-under weave that rebuilds fabric rather than joining two edges. It is not the same as a running stitch, and mixing them up is one of the most common beginner errors.
Running Stitch vs. Darning Stitch
A running stitch goes in and out along a single line. It joins fabric or closes a seam. A darning stitch builds a woven surface across a gap. If you use a running stitch to close a hole in a knit, the repair will pull open the first time the garment stretches.
Tips for a Neat Darning Stitch
- Keep warp threads evenly spaced
- Alternate over and under on each row
- Don't pull tight; let the patch stay flat
- Extend the weave past the hole on all sides
- Match thread weight to the fabric
| Mistake | What Happens | The Fix |
|---|---|---|
| Pulling threads too tight | Patch puckers and stiffens | Weave loosely, press after |
| Wrong thread weight | Lumpy, obvious repair | Match yarn to fabric weight |
| Weaving only inside the hole | Patch pulls out fast | Extend past the hole edges |
| Skipping edge prep | Hole keeps growing | Secure frayed edges first |
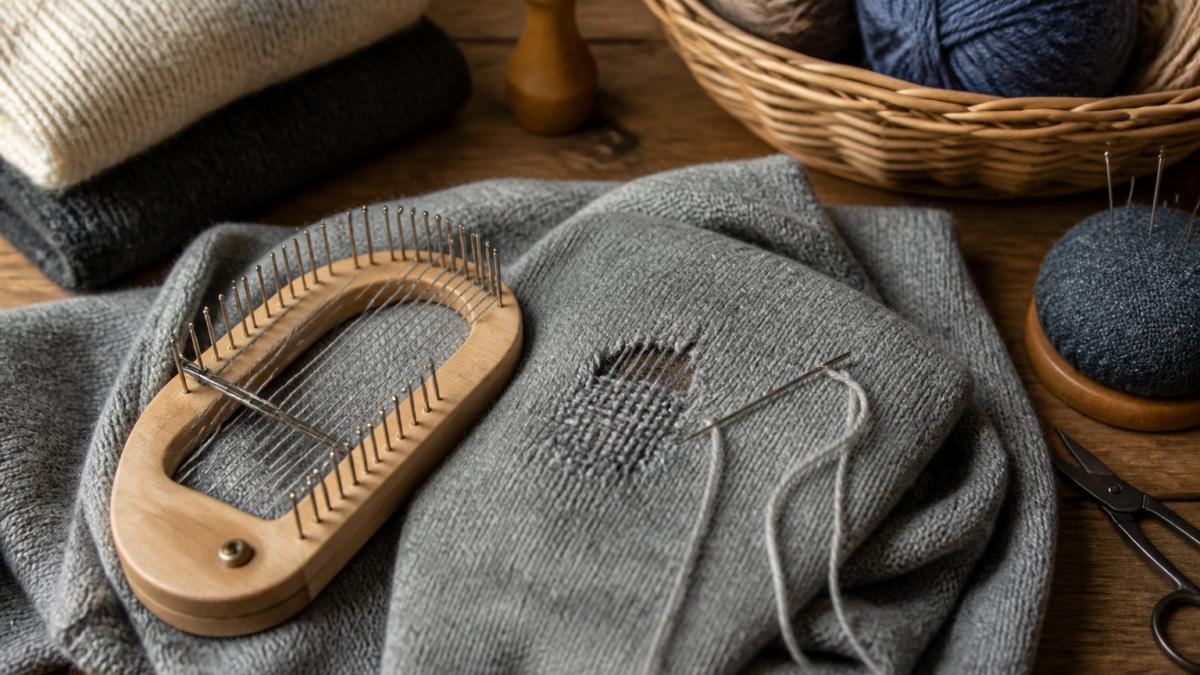
Darning Loom: Speed Up Your Repairs on Knits and Denim
A darning loom holds your work flat and creates even, consistent stitches with far less hand fatigue. For anyone repairing more than the occasional sock, it is the single biggest upgrade you can make.
How a Darning Loom Works
You stretch the damaged area over the loom's frame and hook the warp threads onto its metal teeth. The loom keeps spacing perfect while you weave the weft by hand. The result is a tidier patch in less time, and your hands stay relaxed.
Choosing the Right Loom for Your Fabric
- Small speed looms: best for socks, cuffs, and small holes
- Larger looms: better for sweater elbows, denim knees, and bigger worn areas
- Adjustable looms: worth it if you repair many fabric types
Thick denim and delicate knitwear both work on a loom, but tension settings differ. Denim needs a firmer hold. Fine knits need a lighter touch so the fibers don't stretch out of shape.
Visible vs. Invisible Darning: Which Style Suits Your Garment?
Visible darning makes the repair a feature, using contrast thread and bold color. Invisible darning matches the original fabric so closely that the patch disappears. Neither is better. The choice depends on the garment and your goal.
Choose visible darning when:
- The repair is on a casual or statement piece
- You want to add character, not hide damage
- The fabric is heavily worn and a seamless match is impossible
Choose invisible darning when:
- The garment is formal or workwear
- You want the repair to blend in completely
- The fabric color and texture are easy to match
Many beginners start with visible mending because it's more forgiving. A bold patch is meant to be seen, so small imperfections read as style rather than mistakes.
Common Mistakes That Ruin a Darn (and How to Avoid Them)
The biggest mistake is rushing the prep. Most failed darns start with an unsecured hole that keeps fraying under the patch. Fix the edges first, and half your problems disappear.
Other frequent errors:
- Using thread that's too thick for the fabric
- Pulling every stitch tight instead of letting the weave sit flat
- Working without something under the fabric to hold it taut
- Stopping the weave at the hole edge instead of extending past it
- Skipping the final press, which leaves the patch stiff and obvious
A common mistake is choosing a repair method before checking the fabric type. A technique that works on thick denim can damage a fine merino knit. Match your method to the material, and your repairs will hold.
Conclusion: Start Darning Today, Keep Your Clothes Longer
Every garment you repair is one less item in a landfill and one less replacement on your card. The skill takes an afternoon to learn and a lifetime to refine. You don't need talent. You need a needle, some thread, and twenty minutes.
At Funalya, we make that first repair easier. Our beginner-friendly darning kits and speed looms are built for people who have never held a needle, with useful accessories and tools that handle both small holes and larger worn sections. Customers tell us the kits make repair simple and enjoyable, and that the value shows up fast.
Ready to save your favorite sweater? View Our Products and start your first darn this week.
Frequently Asked Questions
What is darning?
Darning is a sewing technique that repairs holes or worn areas in fabric by weaving new threads over the damaged spot. Unlike patching, darning creates a interlocking grid of threads that mimics the original weave, making the repair strong and flexible. It works on knitted items like socks and sweaters, as well as woven fabrics like denim. The goal is to reinforce the area without adding bulk or stiffness, so the garment remains comfortable to wear.
What tools do you need for darning?
The basic darning tools are a darning needle (a long needle with a large eye), yarn or thread that matches the fabric weight, and a darning mushroom or egg to hold the fabric taut. Scissors and a thimble are also helpful. For larger or thicker areas, a darning loom can speed up the process by holding the warp threads in place while you weave. Funalya offers beginner-friendly darning kits that include these essentials, so you can start right away without hunting for individual items.
Can you darn knitted fabric?
Yes, darning is especially effective on knitted fabric because the weave can stretch with the knit. Use a yarn that matches the fiber content and weight of the original garment to avoid pulling or puckering. For small holes, a simple woven darn works well; for larger areas, a darning loom helps maintain even tension. Always test on a swatch if you're unsure, and avoid over-tightening the threads, as that can distort the knit.
How do you keep a darned repair from puckering?
Puckering usually happens when the darning threads are pulled too tight or when the fabric isn't held flat. Use a darning mushroom or loom to keep the fabric taut but not stretched. Weave the threads with gentle tension, allowing them to lie flat without pulling the edges inward. After finishing, press the repair lightly with an iron (use a pressing cloth for delicate fabrics) to help it settle. If you notice puckering, redo the darn with looser tension.
The hardest part of darning isn't the weave. It's believing you can do it. Most people quit before their first stitch because they assume repair is a specialist skill. It isn't. Funalya builds beginner-friendly darning kits and speed looms that make the first repair approachable, with tools that handle everything from a small sock hole to a worn denim knee. Get started with Funalya and keep the clothes you already love in rotation.