 how-to
Sashiko Mending: A Beginner's Guide to Repair
Table of Contents
- What Is Sashiko Mending?
- Materials You'll Need for Sashiko Thread and Needles
- Best Fabric for Sashiko Repair
- Sashiko Stitching Techniques for Beginners
- How to Mend Jeans with Sashiko
- Repairing Holes, Worn Fabric, and Weak Areas
- Common Mistakes and Troubleshooting
- Caring for Your Sashiko-Mended Garments
- Frequently Asked Questions
Last Updated: October 14, 2026
What Is Sashiko Mending?
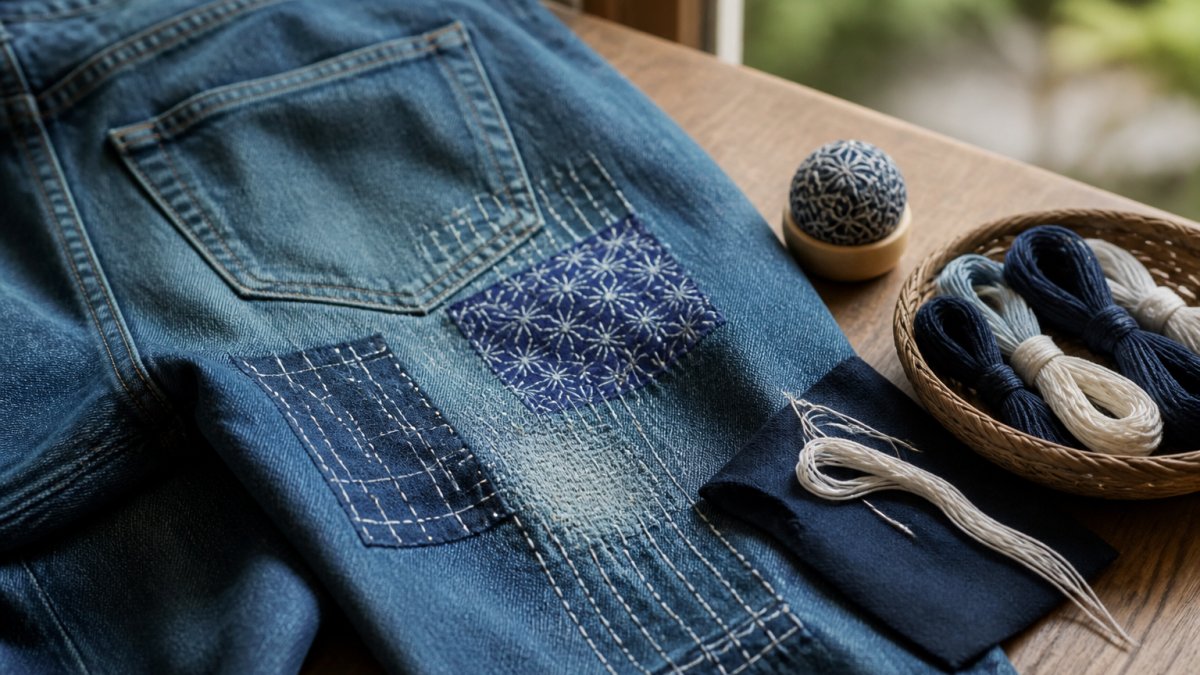
Sashiko mending is a Japanese textile repair technique that combines practical garment restoration with decorative visible stitching. The term comes from "sashi" (pierce) and "ko" (small), meaning "little stabs." Rather than hiding repairs, sashiko celebrates them: you stitch a patch over a hole or worn area with a simple running stitch, creating geometric patterns that become part of the garment's story.
Most people discard clothes at the first hole or thin spot. Sashiko mending extends their life, repairing visibly and beautifully instead of throwing them away.
The Japanese Origins and Philosophy
Sashiko emerged in Japan centuries ago from necessity: working-class people couldn't afford new clothes, so they reinforced worn fabrics by layering scraps and stitching them together.
The philosophy behind sashiko mending reflects respect for materials and craftsmanship.
Today, sashiko mending is central to sustainable fashion: people repair garments rather than replace them, reducing textile waste.
Why Sashiko Means 'Little Stabs'
The running stitch used in sashiko mending creates small, deliberate punctures through fabric.
The name reflects the technique's simplicity: push the needle through fabric, pull it back out, and repeat. The "stabs" accumulate into a pattern that strengthens weak areas while creating visual interest.
Materials You'll Need for Sashiko Thread and Needles
Choosing the right supplies makes sashiko mending easier: the wrong thread breaks, and the wrong needle creates uneven stitches.
Choosing the Right Thread
Traditional sashiko thread is cotton. White on indigo denim is the classic combination, but any contrasting color works, the goal is visibility, so your stitching reads as intentional repair.
Thread weight matters:
- Thin thread breaks easily under tension
- Medium thread works for light repairs on thin fabrics
- Thick sashiko thread handles multiple layers and creates bold patterns
If you can't find dedicated sashiko thread, use embroidery floss or doubled regular thread, something strong enough to withstand repetitive piercing, wearing, and washing.
Selecting Your Needle
A sashiko needle has a larger eye than standard sewing needles to accommodate thicker thread; a tiny eye will fray or reject it.
Sashiko needles are medium to large, blunt or slightly rounded at the tip, and strong enough to pierce multiple layers without bending.
Other Essential Tools
Beyond thread and needle, you'll need:
- Pins or clips to hold your patch in place
- Scissors sharp enough to cut fabric cleanly
- A thimble to protect your finger
- A measuring tape to mark stitch spacing
- Fabric chalk or a pencil to draw stitch lines
Funalya provides accessible, beginner-friendly tools designed to make garment repair simple and practical for everyone, including useful accessories.
Best Fabric for Sashiko Repair
Not all fabrics work equally well for sashiko mending. Understanding fabric compatibility helps you choose patches that last and look intentional.
Patch Fabric Selection
For denim and heavy cotton: use sturdy cotton or linen patches. Indigo-dyed fabric looks cohesive; white, cream, or patterned fabric makes the repair visible.
The best patches come from fabric you already own, old sheets, worn jeans, or scraps. This is sustainable and ensures color and fiber compatibility.
Working with Different Garment Types
Different garments need different strategies: jeans require heavy-duty reinforcement, sweaters gentler handling, and delicate fabrics careful stitch placement.
Knitwear and sweaters stretch and move, so your patch must flex with the garment.
Delicate fabrics like silk or fine wool need special care.
Sashiko Stitching Techniques for Beginners
The running stitch is the foundation of sashiko mending. Master it and you can repair almost anything; the beauty comes from consistent spacing and intentional patterns.
The Running Stitch Foundation
The running stitch is the simplest hand-sewing stitch: push the needle through fabric, pull it back out, and repeat. No complex knots required.
- Thread your needle and tie a knot at the end
- Push the needle up through the fabric from underneath
- Push it back down about one-quarter inch away
- Pull the thread snug but not tight
- Repeat, creating a line of even stitches
The key is consistency: each stitch roughly the same length, each gap uniform. Tension matters too, pull too hard and the fabric puckers, too lightly and the stitches won't reinforce.
Stitch Spacing and Geometric Patterns
Sashiko patterns emerge from intentional stitch spacing. The most common are geometric, parallel lines, diamonds, grids, and cross-hatching, and they distribute reinforcement evenly across the patched area.
- Parallel lines run horizontally or vertically across the patch
- Diamonds create a cross-hatching effect with diagonal lines
- Grids combine horizontal and vertical lines
- Waves follow curved lines for a softer look
To create a pattern:
- Mark your stitch lines lightly with fabric chalk or pencil
- Space lines about one-quarter to one-half inch apart
- Stitch along each marked line, keeping stitches consistent
Closer spacing means a stronger repair; wider spacing gives lighter reinforcement and a more delicate look. Beginners should start with parallel lines, then try diamonds or grids.
How to Mend Jeans with Sashiko
Jeans are the perfect garment for learning sashiko mending: denim is forgiving, thick enough for bold stitching, and repairs look intentional and stylish.
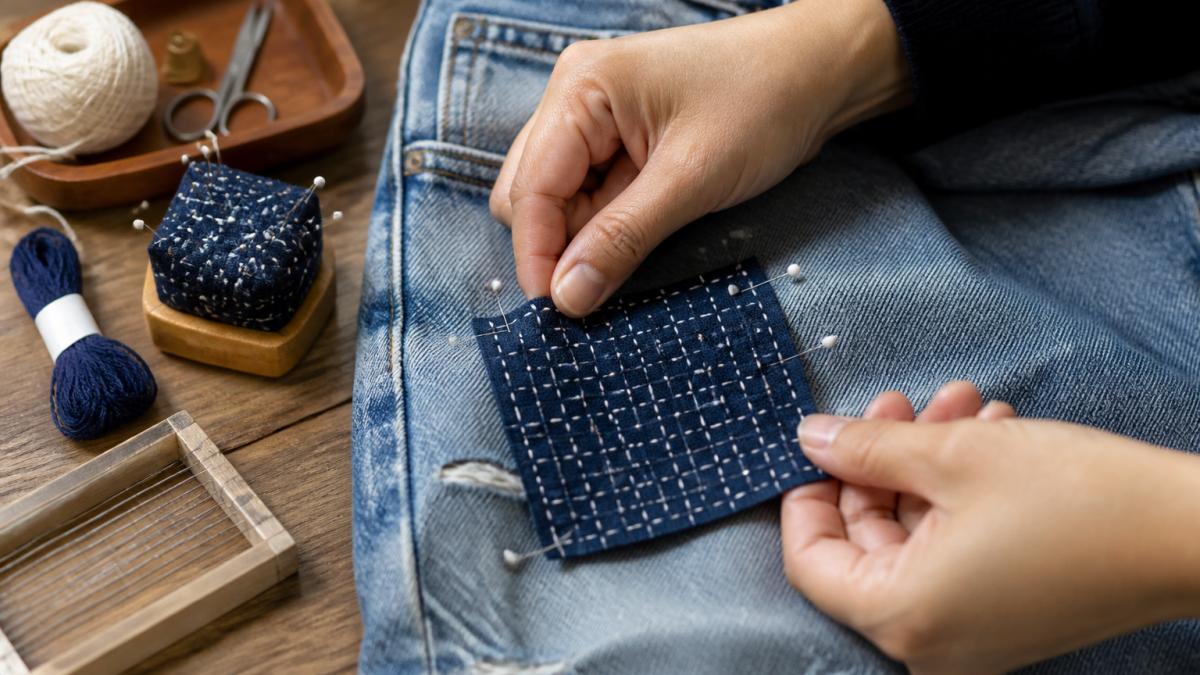
Preparing Your Denim
Before you stitch, prepare the damaged area and select your patch.
Inspect the damage. A small hole, a thin spot about to tear, and worn-through fabric each need slightly different handling.
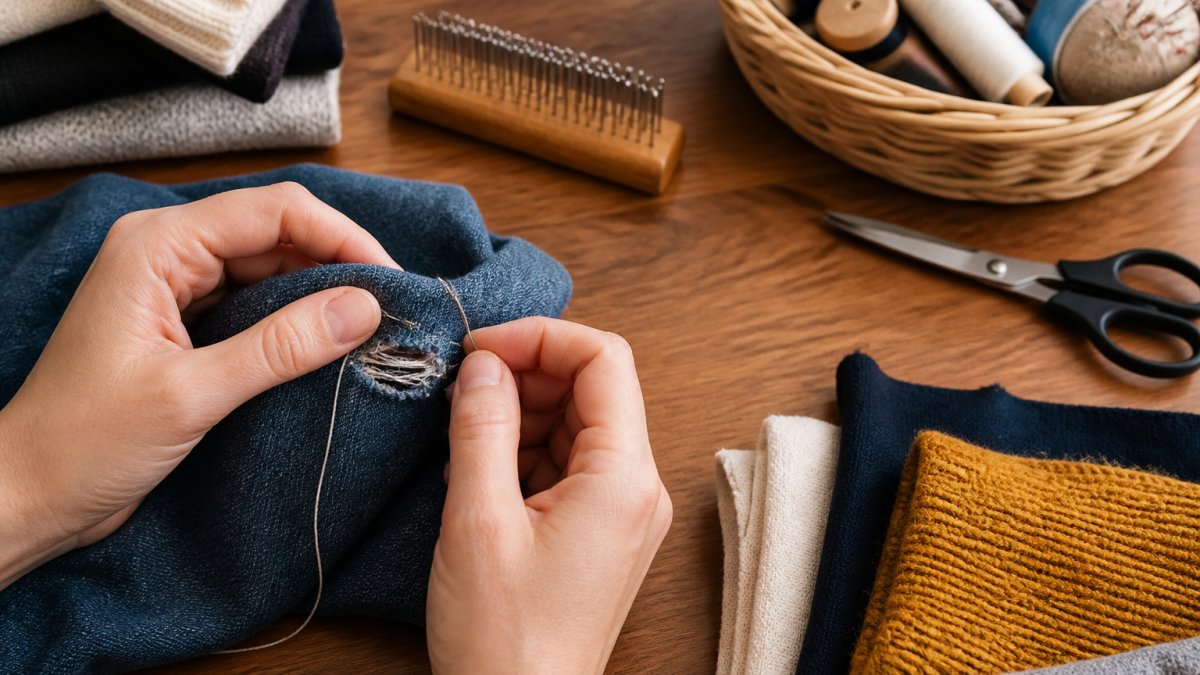
For small holes (less than one inch): cut away loose threads, create a clean edge, and use a simple patch.
Positioning and Securing Your Patch
Pin or baste your patch in place before stitching to prevent shifting, which creates uneven stitches and weak repairs.
- Place the patch over the damaged area
- Pin it securely with at least four pins, or baste with temporary contrasting stitches
- Make sure the patch is smooth and wrinkle-free
Sashiko is typically visible, so patch jeans from the outside. The patch should cover the damage completely with at least half an inch of overlap on all sides; uneven overlap looks sloppy.
Stitching the Repair
Now you're ready to stitch.
Plan your stitch pattern. Mark light lines with fabric chalk if it helps; for jeans, simple parallel lines or a diamond pattern works well.
- Tie a knot at the end of your thread
- Push the needle up through all layers (patch + jeans + any lining)
- Create running stitches along your marked lines, keeping them even and consistent
- Work methodically across the patch
Space your lines about one-quarter to one-half inch apart, closer spacing means a stronger repair. On jeans, be bold with visible stitching.
Once your pattern is complete:
- Tie off your thread on the inside with a secure knot
- Weave the thread end through a few stitches to hide it
- Trim excess thread
The sashiko stitching reinforces the patch and creates a beautiful, intentional design.
Repairing Holes, Worn Fabric, and Weak Areas
Sashiko mending handles different types of damage. Knowing which approach to use ensures repairs last and look intentional.
Addressing Small Holes and Tears
Small holes (less than one inch) need simple, direct repairs, no elaborate patch required.
- Cut a patch about two inches square
- Position it over the hole and pin securely
- Stitch around the edges with a running stitch
- Add one or two interior lines for reinforcement
Keep stitches tight on small repairs; loose stitches won't hold. For small tears, align the torn edges, use a patch covering the tear plus at least half an inch on all sides, and stitch with slightly tighter tension to pull the tear closed.
Reinforcing Worn-Through Fabric
Worn-through fabric is so thin it's about to tear. The fibers are intact but fragile, and reinforcing now prevents holes later.
- Select a patch slightly larger than the worn area
- Position it over the weak spot
- Stitch with a close pattern (lines one-quarter inch apart) to distribute stress across a larger area
Worn elbows on sweaters, thigh rubs on jeans, and pocket corners are common weak spots. Catching these early saves the garment.
Strengthening Weak Areas Before Damage Worsens
Prevention is easier than repair. If an area starts to wear, reinforce it before it fails.
Signs of weakening fabric: discoloration or pilling, thinning you can feel by hand, areas that stretch more than surrounding fabric, and fading or fuzziness.
Common Mistakes and Troubleshooting
Even experienced menders make mistakes. Knowing what can go wrong helps you avoid or fix problems quickly.
Tension and Stitch Consistency
Uneven tension creates weak spots. If some stitches are tight and others loose, stress concentrates on the loose ones and they fail first.
- Too tight: Fabric puckers and stitches pull the patch out of shape.
- Too loose: Stitches wiggle and don't reinforce effectively.
- Inconsistent: The repair fails at the loose points.
Maintain steady, moderate tension: pull each stitch snug but not straining, loosen slightly if you see puckering, tighten if stitches wiggle, and practice on scrap fabric first.
Thread Breakage and Needle Issues
Solutions: use thicker sashiko thread, reduce tension slightly, switch to a needle with a larger eye, check thread for fraying before starting, and use fresh thread rather than old spools.
Needle issues include bending, breaking, or creating holes that are too large. A bent needle creates crooked stitches; a dull one damages fabric fibers.
Securing Your Stitches Properly
A loose knot at the end means your entire repair unravels. Secure stitches properly to keep repairs intact through washing and wearing.
- After your last stitch, pull the needle to the back of the fabric
- Create a small loop with the thread
- Pass the needle through the loop twice
- Pull tight
- Weave the thread end through several stitches on the back
- Trim excess thread
Test your knot by pulling gently, it shouldn't slip. For extra security on important repairs, tie multiple knots, weave the thread through several stitches, and stitch over your starting and ending knots.
Caring for Your Sashiko-Mended Garments
A well-executed sashiko repair lasts for years. Proper care keeps it strong.
Washing and Drying Guidelines
Sashiko repairs are durable, but washing technique matters, rough machine handling can stress repairs, especially early on.
Stitches loosen slightly after the first few washes as the repair settles into the fabric. After 5 to 10 washes, it stabilizes.
When to Restitch or Reinforce
Most sashiko repairs last as long as the garment, but sometimes you need to restitch or add reinforcement.
If only a few stitches are loose, tie them off and restitch that section.
Additional reinforcement helps if the repair area shows new wear, the garment is worn frequently, or you want extra durability.
At Funalya, we believe every garment deserves a second chance.
Frequently Asked Questions
Can you use sashiko to mend jeans?
Yes, sashiko is ideal for mending jeans. Denim's weight and durability make it perfect for sashiko repair. The visible running stitch creates both strength and visual appeal on denim. Use white or contrasting thread to make the repair a design feature. Prepare the area by positioning a cotton patch behind the hole or worn section, then stitch through both layers with consistent spacing. Jeans mended with sashiko often become more distinctive and personal.
What tools do you need for sashiko mending?
Essential tools include a needle suitable for hand sewing, sashiko thread or embroidery thread, scissors, pins, a thimble for protection, and a measuring tool or ruler for spacing. You'll also need a patch of fabric that matches or complements your garment. Beginner-friendly mending kits bundle these items together and include useful accessories. Having everything organized before you start makes the process smoother and reduces frustration.
How do you wash clothes repaired with sashiko?
Wash sashiko-mended garments by hand or on a gentle machine cycle with cold water. Turn the garment inside out to protect the repair from friction. Use mild detergent and avoid bleach. Air dry when possible to prevent stress on the stitches. If the garment is heavily worn, hand washing is gentler. Inspect the repair after washing to ensure stitches remain secure. Most sashiko repairs are durable, but gentle care extends their lifespan significantly.
What does sashiko mean in Japanese?
Sashiko translates to 'little stabs' in Japanese, referring to the small, repeated running stitches that form the technique. The name captures the hand-stitching action: each stab of the needle through fabric creates one stitch. This Japanese textile repair tradition dates back centuries and combines function with beauty. The visible stitching turns mending into a decorative art form, celebrating the repair rather than hiding it. Understanding this cultural context deepens appreciation for the craft.